Followers

Sunday, 30 November 2014

Claritystamp Challenge - Trees

Hi folks - December already!!!!
Congratulations to our winners from last months Challenge, brilliant entries yet again.

The Challenge for this month is Trees and below is my inspiration.

I didn't make life easy for myself with this one, it turned out to be very fiddly.


I started by brayering the background, this bit was very easy as it doesn't matter if you get lines!!! 

Then I masked off the frame around the stamp before inking.  Then I told off the tape and stamped twice, side by side, without the frame.

I drew a squiggly line across the top of the trees and used Momento London Fog to put in the shadows under the trees.

When the ink was dry on the trees I used a white pen to draw in the snow down the left hand side of the trees.


I then stamped Happy New Year underneath.

I always get New Year cards to send to the people who send me a xmas card when I haven't sent one to them!!  Shhhh ...........


Saturday, 29 November 2014

PanPastel Challenge - Colouring

For this Challenge I have used a lovely Sheena Douglass Magnolia stamp.

For the background I used the pastel shades of the PanPastels and stamped the Magnolia in second generation ink.

For the foreground I stamped the Magnolia in first generation ink and used the darker colours to bring out the image.

A little matting and layering and the Magnolia word stamp on the same background finishes off the project.

There are brilliant projects from my Team mates over on the PanPastel Challenge blog - it would be great if you could join us over there and it would be even better if you had a project to enter our Challenge.

Thank you so much for popping in, I have more xmas cards to make today.


Sunday, 23 November 2014

PanPastel - Cold and Frosty

Morning all.
Congratulations to the winner and Top 3 of Add Bling Challenge.

Today I've made a Tag out of acetate.  Not the easiest item to photograph (I found out).

I stamped snowflakes with White pigment ink and sprinkled with Frantage embossing powder.  I added an MDF reindeer.  For reindeer I painted with Maimeri Gesso and then covered with the Coarse White PanPastel medium. The shimmer on this is amazing (again not showing on my photo!) and I then edged it with Pearlescent blue PanPastel and added gems round it's neck.

The Cool Yule was added by using Maimeri Modelling paste through a stencil and once dried covered with the Pearlescent blue PanPastel. 

Even the organza bow was tinted with the Pearlescent blue.

Hope you like my offering for today,


Saturday, 15 November 2014

Sweet Lilac Flowers - Christmas

Hi folks it's another Challenge over at Sweet Lilac Flowers, good luck to the winner of last months Challenge.

I was inspired to make a tag for this Challenge after watching brilliant demos by the lovely Hels Sheridan at the NEC las week.

I started with a size 8 tag on to which I put texture paste through a script stencil.  Once this was dry I inked with Worn Lipstick and Frayed Burlap Distress Ink.  After drying I rubbed over gilding wax to make the script pop.

The gorgeous pearl ribbon and flowers are from Sweet Lilac, I give my flowers more texture by spraying with water and scrunching them.  The flourishes are die cuts with gold paper and the little add on is stamped with free stamps from a magazine.

A lovely bow and tinsel ribbon tops it all off.

I hope you have time to enter our Challenge this week, pop over HERE to see the fabulous projects my team mates have produced.

Wednesday, 12 November 2014

PanPastel Challenge - Cold and Frosty Colours

A new Challenge over on the PanPastel Challenge Blog today.

Below is my project for this week - a Christmas Card!!!  Do need to start soon on the rest. :-/.

This was such great fun to make.  I stamped the main cottage with Momento London Fog and then coloured with PanPastels.  After adding a bow, glitter and a few snowflakes all done.

Pop over to have a look at the projects made by my lovely team mates, they're amazing xxxx


Finnabair Workshop

Hi All

I'm back from the NEC now and all caught up with my jobs!!

A few weeks ago I was lucky enough to take part in a Finnabair workshop organised by a wonderful lady Sue Tucker.

We were all asked to make a badge to wear, in the style of Finnabair.

I was absolutely delighted to be awarded a prize for my badge, along with two others, and thought you may like to take a look at it.

Catching up with my crafty commitments today.  Thanks for popping in.


Saturday, 1 November 2014

PanPastel Challenge - Add some Bling

Well ladies we all like a bit of bling so why not join in with the Challenge over on the PanPastel Challenge Blog.  My friends and team mates have been busy again with their fabulous projects, well worth a look.

This is my project with a few pics taken along the way.


I decided to make a small canvas for this project so I started with a coating of white Gesso.


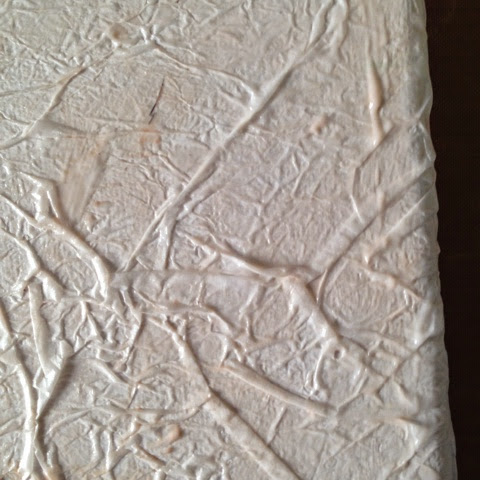
I then added crinkled tissue paper for texture.


A few bits of metal and gauze!


The I added a modelling paste splatter.


I then coated everything with black acrylic paint but I forgot to,photograph that bit!


I added blue and yellow PanPastels from the new Pearlescent range and some light gold metallic. 

I love Angelina fibres so added some under my metal embellishment (added bling in the centre of the metal flower of course). 

For the word Hope I used Tim Holtz Alpha cards to wich I added a little Salty Ocean Distress Ink and a bit of light gold metallic PanPastel.

Hope you like it and thanks for popping by.


Claritystamp Challenge - Travel

Morning all - November already!  Yikes this year is zooming by.

Congratulations to the winner and Top 5 of the Autumn Challenge.  What a talented group you are.

Onto this months Challenge - which is Travel.  Well, flying on heart shaped balloons is Travel right?


For this one I took the Woodland stencil and a moon mask and created a landscape with good old torn copy paper and Adirondack inks.

I then masked off the landscape with the "inny" which comes along with the stencil.

On top of that I used the Tangle stencil, when all the colour was down I removed the stencil and added a lighter colour to soften the white card.

Finally I added the Girl Love Balloon stamp making sure the word Love was placed in the sun.

Pop over to the blog and have a look at the projects made by my Team mates - they're amazing!

Thanks for popping by today.